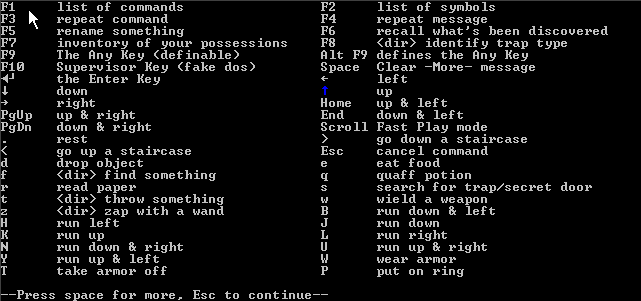
One of the recognizable features of the original Rogue game was the long list of key commands that the player used for all actions, from the arrow keys for movement to “i” for inventory, “r” for reading a scroll and “q” for quaffing a potion. On a console-based game in the days before the mouse was standard equipment, that was pretty much what the developers had to work with so fans of the game learned these keys over many hours and days of game play. With practice, they were much faster than menus and mouse-clicks.
Windows Forms apps are still capable of capturing and responding to keystrokes and, in this chapter, we’ll look at how to work with them and pass information back and forth between the program’s classes.
This post is part of a series on creating a roguelike game in C#. For the latest chapters and more information, please visit the Official Project Page on ComeauSoftware.com. The current code for this project is also available on Github.
Starting a New Game
The primary form in the application will be the one handling key events but, before it can do that, it needs to be able to start a new game using the Game class and that game needs to be able to progress from start to finish. Typically, a classic Rogue game runs as follows:
So, as in previous chapters, we need a way to loop through a process and make decisions on the way, except now, that decision loop is going to enclose all the other processes in the game.
First, let’s get the character name.
The Panel Control
The dungeon display form will be the one the user interacts with so it needs to get the name and pass it to the Game class. We need a couple of extra temporary controls to do that but they need to disappear after they’ve done the job. To make that a little easier, I’ll enclose them in a panel.
The Panel control is a container that can hold other controls on the form and enables you to work with them as one group. It also has its own set of properties and formatting settings so that you can treat it as its own region within the form.
In the screenshot above, you can see where I’ve created a new panel on the form by dragging it onto the form from the Toolbox on the left where you see it selected. You can drop other controls within the panel just by dragging them on top of it. In this case, I have a Label, a TextBox and a Button control and I’ve just changed a few properties like the button’s BackColor to make them blend in with the form.
In the Game class, we’re going to change the constructor so it accepts a Player name.
public Game(string PlayerName) {
    // Setup a new game
    this.CurrentLevel = 0;
    this.CurrentMap = new MapLevel();
    this.CurentPlayer = new Player(PlayerName);
    this.CurrentTurn = 0;
}
Then, we’ll make a couple of changes to the form’s code. In the last chapter, the Game object was being declared in the form’s constructor and the form’s Load event was instantiating it. This was just to be able to run the program and test it. The instantiation can now wait until the user clicks on the Start button.
    public partial class DungeonMain : Form
    {
        Game? currentGame;

        public DungeonMain()
        {
            InitializeComponent();
        }

        private void btnStart_Click(object sender, EventArgs e)
        {
            if (txtName.TextLength > 0)
            {
                currentGame = new Game(txtName.Text);
                pnlName.Visible = false;
                lblArray.Text = currentGame.CurrentMap.MapText();
            }
            else
                MessageBox.Show("Please enter a name for your character.");
        }
    }
Note that the Game declaration at the top has changed slightly; it’s been declared as a nullable type by adding a question mark after it. This is typically done with value types like integers when you need them to be instantiated as null and they might possibly remain null. It’s not strictly necessary with reference types like the Game class but the form’s constructor was throwing a warning that this class-level object was null when the constructor finished it’s work. It didn’t break the program but adding the question mark was a trivial change to keep it happy and it will come in useful later.
Then, the Start button’s Click event examines the length of the text in the new TextBox control. You can generate the basic event code by selecting a control on the form, viewing its events in the Properties panel and double-clicking next to the event you want to write. You can see in the screenshot below that the Click event has been selected and a click event has been added to it.
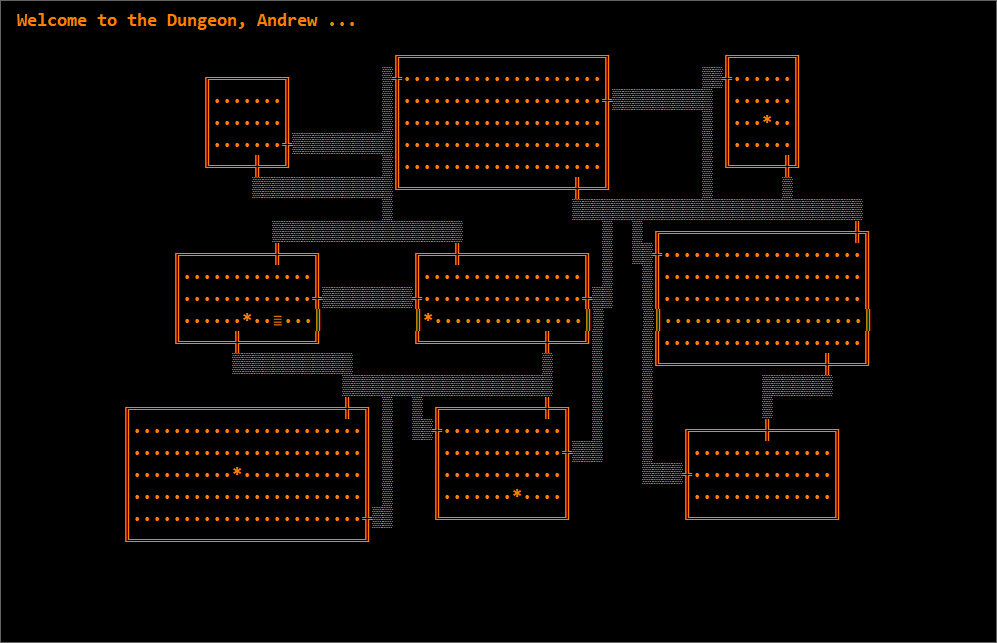
Going back to the code, if the length of the text is greater than 0, it will instantiate the new Game object, hide the panel and all its controls by setting its visible property to False and then show the map for the first level by calling the MapText() method from the Game class. If the user doesn’t enter a name, they’ll get a message box asking them to do so.
Capturing Keystrokes
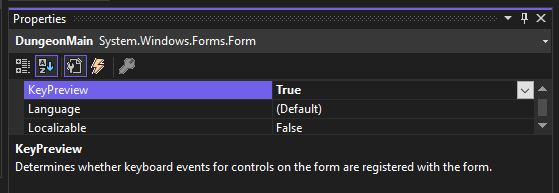
On Windows forms, keystrokes are captured by the active control which can then use event methods to respond as needed. If you want the form itself to see the keystrokes and respond to them, you need to set the form’s KeyPreview property to True as shown below.
After you set the form to capture the keystrokes, it has three events that can be used depending on the exact response you want – KeyDown, KeyPress and KeyUp.
As a test, you can actually create events for each of these by double-clicking in the space next to the event and letting Visual Studio create the event code. Then use the Debug.WriteLine method to output some information to the Output window when keys are pressed. The KeyPressEventArgs and KeyEventArgs classes shown in the method declarations below supply information about the key that was pressed.
private void DungeonMain_KeyPress(object sender, KeyPressEventArgs e)
{
    Debug.WriteLine("Key Press - " + e.KeyChar);
}

private void DungeonMain_KeyUp(object sender, KeyEventArgs e)
{
    Debug.WriteLine("Key Up - " + e.KeyValue);
}

private void DungeonMain_KeyDown(object sender, KeyEventArgs e)
{
    Debug.WriteLine("Key Down - " + e.KeyValue);
}
The KeyPress event only fires for character keys like letters and numbers, not CTRL, ALT or SHIFT, so KeyPressEventArgs has a property that holds the actual character pressed. KeyUp and KeyDown have a KeyValue property in KeyEventArgs that holds the ASCII numeric value. The KeyCode property holds a text description of the key.
The following is the result of the above code when I type my own name in the new textbox on the main screen.
Key Down - 16
Key Down - 65
Key Press - A
Key Up - 65
Key Up - 16
Key Down - 78
Key Press - n
Key Down - 68
Key Press - d
Key Up - 78
Key Up - 68
Key Down - 82
Key Press - r
Key Down - 69
Key Press - e
Key Up - 82
Key Down - 87
Key Press - w
Key Up - 69
Key Up - 87
I held down the SHIFT key for the first letter so you can see a KeyDown event with the value of 16, then another one for 65 (A) and a KeyPress event for ‘A’. Then both have a KeyUp event as there was a slight pause before I typed the rest of the letters.
Notice that the rest of the events don’t happen in order. I type fast enough that the KeyUp events for ‘n’ and ‘d’ don’t fire until after both have been pressed. If you try this exercise on your own, you can type at different speeds and see how it affects the order in which the events fire.
After I finished typing my name and clicked Start, I then held down the ‘a’ key for a couple seconds and let go.
Key Down - 65
Key Press - a
Key Down - 65
Key Press - a
Key Down - 65
Key Press - a
Key Down - 65
Key Press - a
Key Up - 65
So, the KeyDown / KeyPress events will fire continuously as long as the key is held. This is important since, in the original game, the player will often hold down a key like ‘s’ in order to search for hidden items. Each press of the key only gives a 1 in 5 chance of actually finding the item so it’s easiest just to hold it down for a couple seconds in most cases. Knowing this, the search function would need to be attached to either of these events to run repeatedly while the key is held down.
Using the Keystrokes
The four most-used keys in the game are the arrow keys which are used to move the player around the map so I’ll define those first. These are not character keys and they don’t have a KeyPress event so we can use the KeyDown event instead.
Throughout the game, I want the main form to do as little as possible in order to separate the game logic from the interface so I’m going to pass the key strokes to the currentGame object and let the Game class handle them from there. First, the Game class will need a few constants of its own.
private const int KEY_WEST = 37;
private const int KEY_NORTH = 38;
private const int KEY_EAST = 39;
private const int KEY_SOUTH = 40;
These constants store the KeyValues for the four arrow keys.
Next, let’s add another property to the class. This isn’t directly related to the keys but it will give us a way to report the results of one. This one is going to be a full property since I want to make it read-only outside the class.
private string cStatus;

public string StatusMessage
{
    get { return cStatus; }
}
Also, another line will be added to the class constructor.
cStatus =
    $"Welcome to the Dungeon, {CurrentPlayer.PlayerName} ...";
This sets the beginning StatusMessage to a welcome message for the player using an interpolated string. The dollar sign before the string enables the quick concatenation of the string from the literal text supplied and the value of the class property shown in the curly brackets, in this case the player’s name. You can probably guess already where this will be displayed.
Finally, we need a way for the Game class to handle the keystrokes so I’ll add a public method to the class that the form can call. This is going to be really basic for now.
public void KeyHandler(int KeyVal)
{
    switch (KeyVal)
    {
        case KEY_WEST:
            cStatus = "You moved west.";
            break;
        case KEY_NORTH:
            cStatus = "You moved north.";
            break;
        case KEY_EAST:
            cStatus = "You moved east.";
            break;
        case KEY_SOUTH:
            cStatus = "You moved south.";
            break;
    }
}
Eventually, the method will call other methods depending on which key has been pressed but, for now, it just updates the class’s private status field which the form will now access through the public property with an update to the Start button’s click event.
private void btnStart_Click(object sender, EventArgs e)
{
    if (txtName.TextLength > 0)
    {
        currentGame = new Game(txtName.Text);
        pnlName.Visible = false;
        lblArray.Text = currentGame.CurrentMap.MapText();
        lblStatusMsg.Text = currentGame.StatusMessage;
    }
    else
        MessageBox.Show("Please enter a name for your character.");
}
Then the form’s KeyDown event gets an update.
private void DungeonMain_KeyDown(object sender, KeyEventArgs e)
{
    if(currentGame!= null)
    {
        currentGame.KeyHandler(e.KeyValue);
        lblArray.Text = currentGame.CurrentMap.MapText();
        lblStatusMsg.Text = currentGame.StatusMessage;
    }
}
The event checks that the currentGame object has been instantiated so it doesn’t bother with any key presses until it is. It passes the key value to the new KeyHandler() method which does whatever it’s going to do and then the event simply updates the map and the status message to however the two of them exist after KeyHandler finishes.
Of course, this is going to get a lot more complex from here. The player needs to actually appear on the map and then the game has to keep the player from going through walls or falling out of the hallways. There will also be a lot more keys defined.
In the next chapter, we’ll look at how to do some of that and also how some of the earlier design choices might need to change in order to handle some of these complexities.


